

Shoot to Polish
- ShrutiRoyBir

- Aug 16, 2021
- 2 min read
Updated: Aug 22, 2021
Reference video is an important asset of pre-production. It’s like a guideline for an animator.
There are 3 steps to create character performance animation. Preproduction, Production and Post production means Shoot to Polish the animation. I will show you entire process how I shoot videos and created my animation.
Planning references is really an important part of pre-production. It’s like a guideline for an animator. It has many steps which must be followed:
1. Shoot
2. Analyze
3. Breakdown dynamic Key poses
4. Block dynamic poses in Maya
5. Animate
6. Voice over/dialogue and Music
7. Final polish
Shooting videos can be done with mobile or any camera, acting by your own, easily as I did, it doesn’t have to be perfect. We can analyze all video clips we have, it can be different part from different videos. To cut out some clips, I used Adobe premier, which I am going to analyze.
These videos are demonstrating 3 simple basic Boxing combo attacks. Now I will analyze all the poses in these clips and select the best fitted one. To analyze I used syncsketch, is a powerful tool to analyze the video.
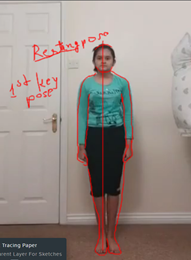
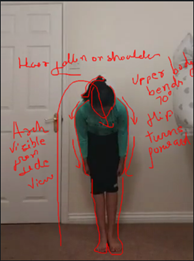
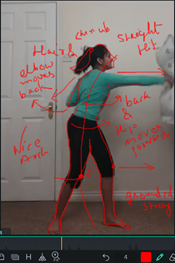
Analyzing acting shots is important, we must observe strong poses, the arches, clear line of action, look at body mechanics; how different body parts moves with a main action and secondary actions which follow the main action or follow against the force of the body movement like movement of hair. Comparing the poses from different perspective gives better idea and helpful to take decision.
I added some of the clips demonstrate criteria I focused more and selected as key poses.


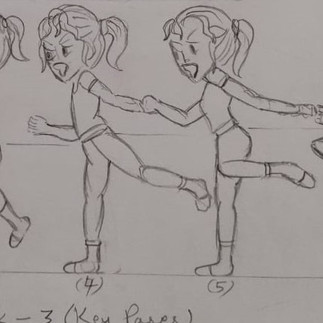
As I have nice poses, now I can illustrate some poses and research on facial expression and hair and eye movement to have better understanding.


Now, as I have selected clips I have merged all clips in adobe premier and use it as reference video for my final animation. And then Finally, blocked the key poses in Maya.


To complete the animation I added some voice over as it is a attack combo the strong action and energy can be expressed with strong voice as reflection. I added some in-betweens to make it flow smoother.
Next step is polish. I can use graph editor to also to add keyframes and at the same time, while fixing the curves in graph editor. Graph editor gives a clear prospective and we can visualize the actual movements while moving any keys to analyze the exact position of any body part and its mechanism and we can fix the issues faster and get a smooth animation.

Best way to do it with one axis at a time, we can move keys up n down and make nice curves to smoothen the animation and get the high quality animation which matches the industry standard.


😂